
Getting the perfect sound from your car stereo isn’t just about cranking up the volume – it’s about unlocking the full potential of every song you love. We’ve all experienced that frustrating moment when our favorite track sounds muddy or when the bass drowns out the vocals completely. The good news? Proper tuning can transform your daily commute into a concert-quality experience.
Most drivers never realize they’re missing out on incredible audio quality that’s already built into their systems. With the right tuning techniques we’ll share, you can achieve crystal-clear highs, punchy mids, and deep bass that’ll make every genre sound exactly as the artist intended.
Whether you’re working with a factory stereo or a high-end aftermarket system, mastering these tuning fundamentals will revolutionize how you experience music on the road. Let’s jump into the essential steps that’ll have your car stereo sounding better than ever.
Understanding Car Stereo Tuning Basics
Car stereo tuning involves adjusting multiple audio parameters to optimize sound quality within your vehicle’s unique acoustic environment. We define this process as the systematic modification of frequency response, timing and spatial characteristics to achieve balanced audio reproduction.

[Versatile Compatibility] This car audio equalizer is compatible with a wide range of car amplifiers, making it suitable for various car and audio setups. It can be easily integrated into your existing car audio system.
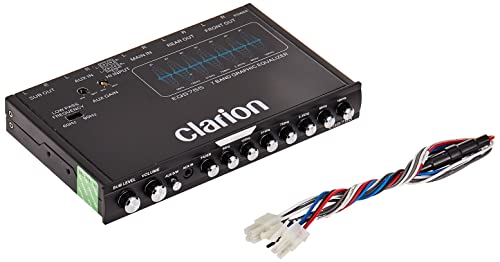
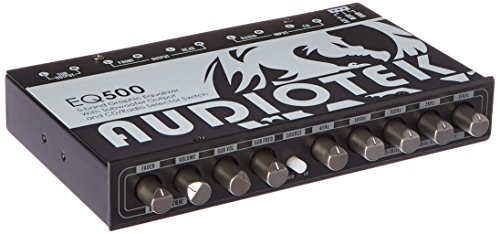
1/2-DIN chassis graphic equalizer with built-in low-pass filter6-channel/ 8-Volt RCA outputs (front, rear and subwoofer)7-ban graphic equalizer (50Hz, 125Hz, 315Hz, 750Hz, 2.2Khz, 6Khz, 16Khz)

Precision Equalization: The Black Diamond EQ7LS boasts a 7-band graphic equalizer, allowing you to fine-tune your audio with precision across frequencies ranging from 50Hz to 12KHz. Whether you're boosting vocals or cutting out unwanted background noise, this equalizer gives you full control over your sound.
Audio Frequency Fundamentals
Sound frequencies span from 20 Hz to 20,000 Hz across the human hearing spectrum. Bass frequencies occupy the 20-250 Hz range while midrange covers 250-4,000 Hz and treble extends from 4,000-20,000 Hz. Each frequency band requires exact adjustments to compensate for your car’s interior acoustics.
Factory stereo systems typically compress these frequencies to prevent speaker damage and reduce manufacturing costs. Aftermarket systems provide expanded frequency response and more precise control options.
Common Tuning Parameters
| Parameter | Range | Function |
|---|---|---|
| Bass EQ | -12 to +12 dB | Controls low-frequency emphasis |
| Treble EQ | -12 to +12 dB | Adjusts high-frequency clarity |
| Balance | Left to Right | Distributes sound between speakers |
| Fade | Front to Rear | Controls speaker positioning |
| Loudness | On/Off | Compensates for low-volume listening |
Equalizer settings form the foundation of stereo tuning by allowing frequency-exact adjustments. Most systems include 3-band, 5-band or graphic equalizers with varying degrees of control precision.
Vehicle Acoustics Impact
Car interiors create unique acoustic challenges that affect sound reproduction. Hard surfaces like windows and dashboards reflect sound waves while soft materials absorb exact frequencies. We encounter these reflections as echoes, standing waves and frequency cancellations that muddy audio clarity.
Seating position influences how we perceive stereo imaging and frequency balance. Driver positioning typically sits closer to the left speakers, creating an imbalanced soundstage that requires compensation through fade and balance adjustments.
Road noise masks lower frequencies and requires ever-changing range adjustments during different driving conditions. Highway speeds generate consistent noise floors around 70-80 dB that affect our ability to hear subtle audio details.
Digital vs Analog Processing
Modern car stereos use digital signal processing (DSP) to enhance audio quality through real-time calculations. DSP systems analyze incoming audio signals and apply corrections for time alignment, crossover points and frequency response.
Analog systems rely on passive components like capacitors and resistors to shape frequency response. These systems offer immediate response but lack the precision and flexibility of digital processing.
Time alignment becomes crucial in car audio because speakers sit at different distances from listening positions. Digital systems can delay audio signals to synchronize arrival times and improve stereo imaging accuracy.
Essential Tools for Tuning Car Stereo Systems

Achieving optimal car stereo sound quality requires exact measurement and adjustment tools that enable precise frequency analysis and system calibration. Professional tuning relies on accurate measurement equipment rather than subjective listening alone.

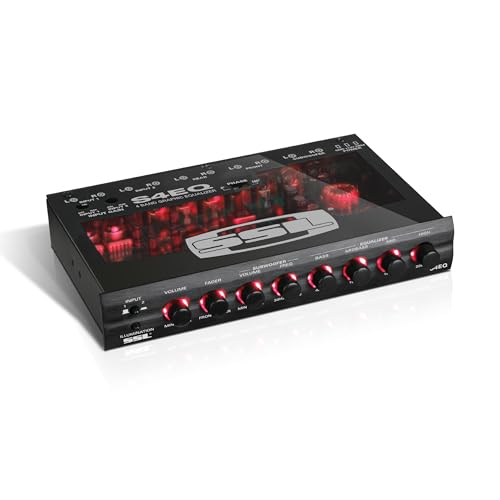
The EQ BASS enables comprehensive remote control of your amplifier, allowing adjustment of volume, Bass Boost, High Pass, Low Pass, and a Limiter.

9-Band Car Audio Equalizer -- Suacopzar car audio equalizer has 9 equalization bands (50hz, 100hz, 250hz, 500hz, 1khz, 2khz, 4khz, 8khz and 16khz) with built-in fader control, intelligent noise reduction, could be adjustable from -12 to +12db. The Subwoofer frequency is in 30Hz to 120Hz adjustment
Real-Time Analyzers and Measurement Equipment
Real-Time Analyzers (RTAs) serve as the foundation for professional car stereo tuning by measuring and analyzing audio frequencies in real-time. These devices identify frequency imbalances that create muddy sound or excessive bass response in your vehicle’s acoustic environment.
High-quality microphones complement RTAs by providing accurate sound level and frequency measurements throughout the tuning process. Measurement microphones capture the actual sound reproduction quality at the listening position, accounting for your car’s unique acoustic characteristics.
Mobile apps like AudioTool bring professional audio analysis capabilities to smartphones, offering convenient equalizer settings adjustments and frequency response measurements. These applications provide real-time feedback during tuning sessions without requiring expensive standalone equipment.
Digital Processing and Control Systems
Digital Signal Processors (DSPs) deliver precise digital control over multiple audio parameters including time alignment, crossover frequencies, and equalization curves. DSP systems enable advanced tuning capabilities that surpass traditional analog controls by providing exact frequency and timing adjustments.
Bass blockers filter unwanted low frequencies from exact speakers, improving overall soundstage clarity and preventing driver damage. These passive filters redirect low-frequency content to appropriate subwoofers while allowing midrange and tweeter speakers to operate within their optimal frequency ranges.
Systematic Tuning Methodology
Initial setup establishes baseline parameters by setting volume to comfortable levels and positioning all EQ, tone controls, balance, and fade adjustments to neutral positions. This neutral starting point prevents existing settings from influencing measurement accuracy.
Balance and fade adjustments create proper soundstage positioning by controlling left-to-right speaker output and front-to-rear distribution. Precise balance ensures centered vocal imaging while fade adjustments optimize the listening position’s acoustic response.
Tone control optimization involves systematic bass, midrange, and treble adjustments based on measurement data rather than subjective preferences. Testing across various music genres validates system performance and reveals frequency response issues that require correction.
| Tool Category | Primary Function | Measurement Capability |
|---|---|---|
| RTA | Real-time frequency analysis | 20 Hz to 20 kHz spectrum |
| Measurement microphone | Accurate sound capture | SPL and frequency response |
| Mobile apps | Portable analysis | Basic EQ and spectrum display |
| DSP | Digital signal processing | Precise timing and EQ control |
| Bass blockers | Frequency filtering | Low-frequency attenuation |
Step-by-Step Guide to Tuning Your Car Stereo

Car stereo tuning requires a systematic approach that builds upon the foundational knowledge we’ve established. We’ll guide you through the essential adjustments that transform your audio system from basic to exceptional.

Capable of handling up to 50 watts of power. Frequency range blocked: 4 ohms: 0-150 Hz / 8 ohms: 0-75 Hz.

【Convenient Installation】Convenient Screw Terminals, sturdy & reliable, small size body can be easy to install with your car audio, stay away from the hassle of welding

The sound effect is shocking, the treble is pure, and the sound quality is excellent
Adjusting Equalizer Settings
Equalizer settings form the backbone of achieving balanced sound reproduction in your vehicle. We start with the equalizer set to a flat position where no frequency bands receive boosts or cuts. This neutral starting point eliminates previous adjustments that might mask acoustic problems.
Real-Time Analyzer apps paired with pink noise reveal frequency response patterns that our ears alone cannot detect. We visualize gaps, peaks, and dips across the frequency spectrum that require correction. The RTA graph displays exact frequency imbalances that occur due to your vehicle’s unique acoustic environment.
Frequency adjustments target problematic areas identified through RTA measurements. We boost frequencies that appear weak in the graph while reducing peaks that create harsh or overwhelming sound. Each adjustment addresses exact acoustic challenges rather than arbitrary sound preferences.
Testing across multiple music genres validates our equalizer settings under various conditions. We verify that vocal clarity remains intact while instrumental separation stays defined across different recording styles.
Setting Crossover Frequencies
Crossover frequencies direct exact frequency ranges to appropriate speakers in your system. We separate the audio signal to ensure low frequencies reach the subwoofer while high frequencies target the main speakers. This division prevents frequency overlap that creates muddy or distorted sound.
| Speaker Type | Frequency Range |
|---|---|
| Subwoofer | 80 Hz to 120 Hz |
| Mid-range speakers | 100 Hz to 800 Hz |
| Tweeters | Above 800 Hz |
Subwoofer crossover settings typically range from 80 Hz to 120 Hz depending on your main speakers’ capabilities. We set the crossover point where your front speakers begin to lose bass response. This ensures seamless transition between the subwoofer and main speakers without frequency gaps.
Mid-range speaker crossovers handle frequencies from 100 Hz to 800 Hz to maintain vocal clarity and instrumental definition. We adjust these settings to complement both the subwoofer’s upper range and the tweeter’s lower range.
Tweeter crossovers protect these delicate speakers from low frequency damage while ensuring crisp high-frequency reproduction. We set these crossovers above 800 Hz to maintain the clarity of cymbals, vocals, and other high-frequency content.
Balancing Front and Rear Speakers
Front and rear speaker balance creates the foundation for proper soundstage positioning in your vehicle. We adjust the left-to-right balance first to center the stereo image between the driver and passenger positions. This ensures that vocals and centered instruments appear to originate from the dashboard center rather than favoring one side.
Front-to-rear fade adjustments position the soundstage forward while maintaining acoustic depth. We reduce rear speaker volume to approximately 20-30% less than the front speakers. This creates the impression that sound originates from the front while rear speakers provide ambient support.
Treble distribution between front and rear speakers requires careful attention to maintain coherent sound staging. We ensure rear speakers produce slightly less treble than front speakers to prevent high-frequency reflections that disrupt the soundstage. This technique maintains clarity while preventing harsh reflections from rear surfaces.
Final balance adjustments account for your primary listening position and passenger preferences. We fine-tune these settings based on where you sit most frequently while ensuring the system performs well for all occupants.
Advanced Tuning Techniques for Audiophiles

Advanced car stereo tuning techniques elevate audio reproduction beyond basic EQ adjustments to achieve true audiophile quality sound. These methods focus on maximizing clarity, balance, and fidelity through sophisticated signal processing and acoustic optimization.
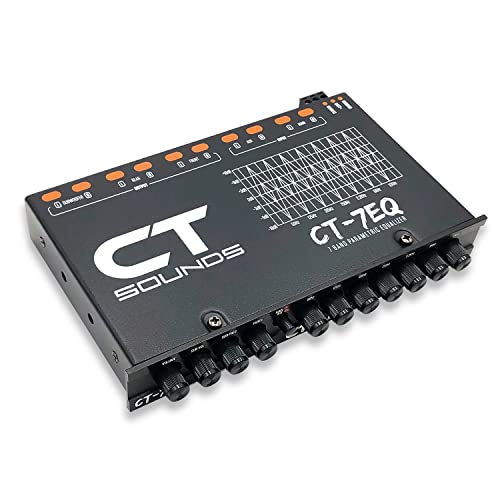
The CT-7EQ is a 7 band 1/2 din parametric car audio equalizer designed to divide and enhance the segment of frequency for your car audio application

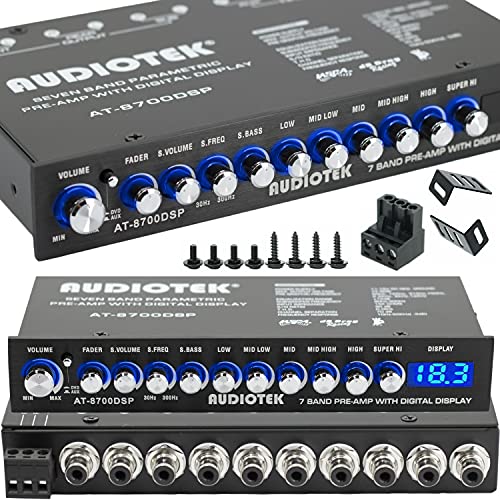
【9 Equalization Bands】-- Our car audio equalizer has 9 equalization bands (50hz, 100hz, 250hz, 500hz, 1khz, 2khz, 4khz, 8khz and 16khz) with built-in fader control, intelligent noise reduction, could be adjustable from -12 to +12db. The Subwoofer frequency is in 30Hz to 120Hz adjustment. (WARM TIP: If you have any questions or concerns, please don't hesitate to contact us, we will try our best to solve the problem for you.)
6 Channel 7-Band High Performance Car Audio 1/2 DIN Pre-Amp Electronic Equalizer
Time Alignment Configuration
Time alignment ensures sound from each speaker arrives at our listening position simultaneously, creating an immersive and centered soundstage. Digital signal processing delays closer speakers so sound waves from all drivers reach us at precisely the same moment.
Modern head units and digital signal processors offer precise time alignment settings for each channel. We measure the distance from each speaker to our primary listening position and calculate the necessary delay adjustments. Front speakers typically require more delay than rear speakers since they’re positioned closer to the driver’s seat.
The synchronization process involves inputting distance measurements into the DSP or head unit’s time alignment menu. Most systems allow adjustments in millisecond increments or distance measurements in inches or centimeters. We start with physical measurements then fine tune by ear using test tones or familiar music tracks.
Proper time alignment creates the perception that sound originates from a single point directly in front of us rather than from individual speaker locations. This technique dramatically improves soundstage depth and imaging accuracy, making vocals appear to float precisely in the center of the dashboard.
Phase Adjustment Methods
Phase adjustment corrects timing relationships between speakers to ensure sound waves reinforce rather than cancel each other. Multiple drivers operating at crossover frequencies can create destructive interference without proper phase alignment.
We verify phase relationships by listening for increased volume and clarity at crossover points between different speakers. Subwoofers and door speakers require particular attention since they often share overlapping frequency ranges. Reversing polarity on amplifiers or using phase switches provides immediate correction for out of phase speakers.
Digital signal processors offer sophisticated phase correction tools that allow precise adjustments in degree increments. We use audio analysis apps to visualize phase relationships and confirm all speakers work in harmony. Test tones at crossover frequencies reveal phase issues through volume drops or hollow sounding reproduction.
Advanced phase alignment involves adjusting not just polarity but also fine tuning phase angles throughout the frequency spectrum. This process requires measurement microphones and real time analyzers to identify exact frequencies where cancellation occurs. The goal remains consistent reinforcement of sound waves from all speakers to create seamless frequency response across the entire audio spectrum.
Common Tuning Mistakes to Avoid

After establishing the proper fundamentals of car stereo tuning, understanding what not to do becomes equally important for achieving optimal sound quality. Many enthusiasts encounter setbacks that could easily be prevented with awareness of these critical errors.

【High Quality Car Stereo Player】- Our double din car stereo size with 7.01"(L)*3.94"(W)2.56"(H), please check the size of your car's radio before ordering. 7inch double din car stereo with 1024*600 Full HD touch screen gives you a fantastic experience. You can enjoy the stream music and the clear picture with your family. Hope you have a good time.
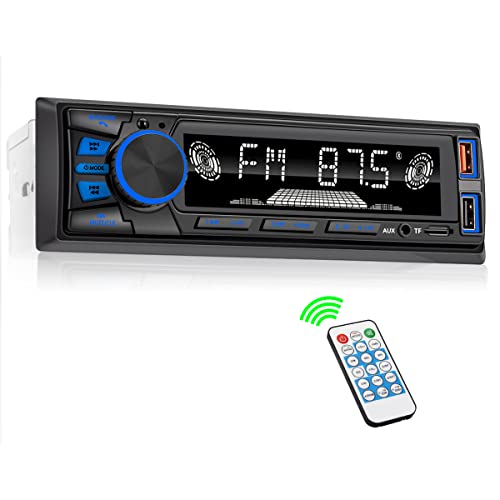
【Bluetooth Connectivity】Hands-free Bluetooth car stereo features easy pairing, supporting crystal-clear hands-free calling for safer driving. This car radio is equipped with a convenient button for answering and ending calls, Siri or Google Assistant can be activated directly by voice on your phone while keeping your eyes on the road. Stream your favorite music and top Spotify podcasts including The Daily, The Joe Rogan Experience to enjoy daily news, stories, and entertainment—ideal for staying informed during your morning commute or making road trips more engaging. Bluetooth streaming enables seamless music playback, making every drive more convenient and enjoyable.

MODERN AUDIO SYSTEM WITH VINTAGE DESIGN: With chromium classic look, vintage style buttons and chrome knobs, the single din media receiver could retain the retro look of your vintage ride like the original, great for classic car enthusiasts
Incorrect Gain Setting Creates System Damage
Setting amplifier gain too high represents one of the most destructive mistakes in car audio tuning. Excessive gain levels cause clipping that damages both speakers and amplifiers permanently. We recommend using oscilloscopes or distortion detectors to establish correct gain settings rather than relying on subjective listening tests. Professional technicians can also perform this adjustment when proper tools aren’t available.
Over-Boosting EQ Frequencies Destroys Balance
Dramatic bass or treble increases create unnatural sound reproduction that fatigues listeners quickly. Boosting frequencies beyond reasonable limits often masks important musical details in other ranges. Balanced bass, midrange, and treble settings produce harmonious sound that enhances rather than dominates the listening experience. Small adjustments of 2-3 dB typically provide noticeable improvements without overwhelming other frequencies.
Ignoring Vehicle Acoustics Compromises Results
Each car’s interior creates unique acoustic challenges that generic tuning approaches cannot address effectively. Hard surfaces reflect sound waves while soft materials absorb exact frequencies differently across vehicle models. Adjusting EQ settings based on how sound behaves within your exact vehicle environment produces superior results compared to universal settings. Testing the same adjustments in different cars reveals how significantly vehicle acoustics impact final sound quality.
Improper Speaker Placement Reduces Clarity
Positioning speakers in acoustically poor locations creates muddy sound reproduction and inconsistent frequency response. Even distribution of speakers throughout the listening area ensures balanced coverage without dead spots or excessive reflections. Suitable mounting locations consider both acoustic properties and practical installation requirements for long-term reliability.
Neglecting System Performance Verification
Tuning without testing across multiple music genres leaves potential issues undetected until later listening sessions. Different musical styles reveal unique aspects of system performance that single-genre testing might miss. Classical music exposes midrange clarity while electronic tracks test bass response and dynamics. Rock recordings challenge the system’s ability to handle complex layered instruments simultaneously.
Incorrect Amplifier Selection Limits Potential
Using underpowered amplifiers prevents speakers from reaching their full performance capabilities. Mismatched amplifier specifications can also create distortion at moderate listening levels. Choosing amplifiers with appropriate power ratings and impedance compatibility ensures adequate headroom for ever-changing musical passages while maintaining clean sound reproduction at all volume levels.
Testing and Fine-Tuning Your Setup

Testing our car stereo setup begins with establishing a neutral baseline across all audio controls. We start by setting equalizer bands, balance, and fade controls to their flat or center positions while temporarily disabling subwoofers to focus on primary speaker adjustments.

NICKEL PLATED LOCKING ADJUSTABLE KNOB: Our 5 Band Graphic Equalizer uses nickel plated adjustable knobs for ideal abrasion resistance and modern design.

【5-Band Adjustable Equalizer】Car Equalizer,Features precise 5-band tuning for custom and enhanced audio quality in your vehicle
Balance and Fade Optimization
Balance control testing requires systematic isolation of each speaker channel. We shift the balance fully to the front left speaker and adjust until sound feels centered and comfortable from our primary listening position. This same process applies to the front right, rear left, and rear right speakers individually.
Front-to-rear fade adjustment creates proper soundstage depth while maintaining vocal focus. We begin with fade shifted completely forward, then gradually introduce rear speakers until we achieve pleasant depth without losing the sense that vocals originate from the front of the vehicle. Research shows that reducing rear speaker treble by 2-3 dB helps maintain front-focused imaging since human hearing localizes high frequencies more precisely than low frequencies.
Frequency Response Testing
Pink noise testing with Real-Time Analyzer apps provides objective measurement data for frequency response optimization. We play pink noise through our system while observing the RTA display to identify frequency peaks and nulls that require correction. This method reveals acoustic problems that casual listening might miss.
EQ band adjustment follows a systematic approach across three primary frequency ranges:
| Frequency Range | Purpose | Common Adjustments |
|---|---|---|
| 20-250 Hz | Bass foundation | ±3 dB for punch or tightness |
| 250 Hz – 4 kHz | Vocal clarity | ±2 dB for presence |
| 4 kHz – 20 kHz | Detail and air | ±2 dB for brightness |
DSP Parameter Verification
Digital Signal Processor testing involves verifying crossover points, time alignment, and phase relationships between speakers. We measure distances from each speaker to our primary listening position and input these values into the DSP’s time alignment settings. Proper time alignment ensures sound from all speakers reaches our ears simultaneously, creating coherent stereo imaging.
Phase adjustment testing uses test tones to identify cancellation issues between speakers. We play sine wave sweeps while adjusting phase settings to maximize output at the listening position. Incorrect phase relationships create audible dips in frequency response that no amount of EQ can properly correct.
Performance Validation
System validation requires testing across multiple music genres at various volume levels. We evaluate vocal clarity during quiet passages, ever-changing range during crescendos, and bass definition during complex musical arrangements. Each test reveals different aspects of our tuning quality and highlights areas requiring additional adjustment.
Volume-dependent testing ensures our system maintains tonal balance across its operating range. Many car audio systems exhibit frequency response changes as volume increases, particularly in the bass region where cabin resonances become more prominent. We verify that our EQ settings work effectively at both moderate and higher listening levels.
Final verification involves playing familiar reference tracks that showcase different frequency ranges and musical elements. These tracks serve as benchmarks for evaluating whether our tuning improvements translate into better overall listening experience across the music we actually enjoy.
Professional vs DIY Car Stereo Tuning

Choosing between professional installation and DIY tuning depends on your technical expertise, available time, and desired audio quality outcomes. Professional car stereo tuning provides access to specialists with extensive knowledge of acoustics, electrical theory, and vehicle-exact integrations. These experts use specialized equipment to optimize sound quality and ensure consistent audio performance across different tracks and volume levels.
Professional technicians address complex configurations like sound staging, equalization, and speaker crossover settings that amateur installers often struggle to master. Their installations include warranties, reducing equipment damage risks and providing post-installation support for system maintenance. Shops typically complete installations efficiently, saving car owners important time and effort compared to DIY approaches.
Advantages of Professional Tuning
- Expert knowledge spanning various car models and audio components
- Efficient installation processes that minimize vehicle downtime
- Superior system integration delivering consistent sound quality
- Warranty coverage with ongoing technical support
Professional services carry higher costs, and expertise levels vary significantly between different installation shops. Research local providers to identify technicians with proven track records in high-quality audio installations.
DIY Car Stereo Tuning Benefits
DIY installation appeals to enthusiasts wanting complete control over their audio system configuration while reducing labor costs. This approach provides valuable learning opportunities about vehicle wiring and audio electronics, knowledge that proves helpful for future upgrades or repairs. Custom installations allow unlimited experimentation with component placement and tuning parameters.
DIY Tuning Challenges
Time requirements for DIY installations often extend across multiple days, involving dashboard disassembly and complex wiring management. Incorrect installation procedures risk damaging vehicle electrical systems or expensive audio components. Achieving optimal audio quality requires proper tuning tools and acoustic knowledge that many DIY installers lack.
| Aspect | Professional Tuning | DIY Tuning |
|---|---|---|
| Expertise Level | Advanced knowledge with specialized tools | Variable based on personal skill |
| Installation Time | 2-4 hours typically | 8-20 hours potentially |
| Total Cost | $200-800 labor plus parts | Parts cost plus personal time |
| Damage Risk | Low with warranty protection | Higher due to inexperience |
| Sound Quality | Optimized and consistent results | Dependent on skill and equipment |
| Customization Options | Limited to professional recommendations | Complete control over design choices |
DIY tuning suits technically inclined individuals willing to invest substantial time learning proper techniques. Professional installation guarantees high-quality results efficiently but requires larger financial investment. Consider your budget constraints, technical abilities, and desired audio performance when making this decision.

The EQ7 equalizer car audio is an excellent choice for easy audio adjustments on the tips of your finger. Easy adjustability over you car audio system.

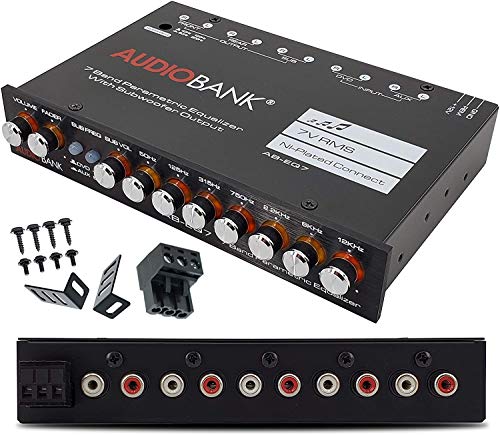
7 Equalization bands (63hz, 125hz, 315hz, 750hz, 2.2khz, 6khz, and 12khz), could be adjustable from -12 to + 12db. The Subwoofer frequency is in 30Hz to 120Hz adjustment. (💡💡WARM TIP:If you have any questions or concerns, please don't hesitate to contact us, we will try our best to solve the problem for you.)
Subwoofer output uses a built-in 12dB per octave electronic crossover fixed at 30Hz-300Hz
Conclusion
We’ve covered everything you need to transform your car’s audio system from basic transportation sound to an immersive listening experience. Whether you choose the precision of professional installation or the satisfaction of DIY tuning your system deserves the attention to detail we’ve outlined.
Remember that great car audio isn’t about the most expensive equipment—it’s about understanding your vehicle’s unique acoustic environment and making informed adjustments. The tools and techniques we’ve shared will help you avoid common pitfalls while achieving the sound quality you’re after.
Your journey to perfect car audio doesn’t end here. Keep experimenting with different settings as your musical tastes evolve and don’t hesitate to revisit our tuning methodology whenever you upgrade components or notice changes in your system’s performance.


【Sound Accuracy】Designed with wiring and high-quality components, the car speaker frequency divider enhances sound quality and accuracy, improving your overall listening experience.

2800Hz crossover point for clean separation of bass and treble . Engineered for 4Ω–8Ω car speakers, handling 80W power with ultra-low distortion
Frequently Asked Questions

Multifunctional Car Audio Equalizer -- Suacopzar EQ-819 car audio equalizer with built-in fader control, intelligent noise reduction, which could be adjustable from -12 to +12db. The Subwoofer frequency is in 30Hz to 120Hz. It also feature the Karaoke function, with 2 microphone input and echo adjustment, which is perfect for amusement
Seven equalization bands (50Hz, 125Hz, 315Hz, 750Hz, 2.2kHz, 6kHz, and 12kHz), each frequency is adjustable from -12 to + 12dB (-15 to +15dB for subwoofer frequencies)
What is car stereo tuning and why is it important?
Car stereo tuning involves adjusting various audio parameters like EQ, balance, fade, and time alignment to optimize sound quality within your vehicle’s unique acoustic environment. It’s essential because your car’s interior creates challenges like sound reflections and frequency cancellations that affect audio reproduction. Proper tuning transforms muddy, unbalanced sound into concert-quality audio by compensating for these acoustic issues and unlocking your system’s full potential.
What tools do I need to tune my car stereo properly?
Essential tools include a Real-Time Analyzer (RTA) to measure audio frequencies and identify imbalances, a high-quality microphone for accurate sound measurement, and mobile apps like AudioTool for convenient adjustments. For advanced tuning, a Digital Signal Processor (DSP) provides precise control over audio parameters. These tools enable data-driven adjustments rather than guesswork, ensuring optimal sound quality across all frequencies.
How do I adjust my car stereo’s equalizer settings?
Start by playing pink noise and using an RTA app to identify frequency response patterns. Look for peaks and dips in the frequency spectrum, then make precise adjustments to flatten the response curve. Avoid over-boosting frequencies, which creates unnatural sound. Focus on cutting problematic frequencies rather than boosting others. Test your adjustments with various music genres to ensure balanced reproduction across different types of content.
What is time alignment and how does it improve sound quality?
Time alignment ensures sound from each speaker arrives at your listening position simultaneously by adjusting delays for speakers at different distances. This creates proper stereo imaging and an immersive soundstage. Measure the distance from each speaker to your ears, then configure delays so all sound arrives together. Proper time alignment eliminates phase issues and creates the illusion that sound is coming from a single, focused point.
Should I hire a professional or tune my car stereo myself?
Professional tuning offers expert knowledge, efficient installation, and warranty protection, ensuring optimized results but at higher cost. DIY tuning provides complete control and valuable learning experience while saving money, but requires significant time and technical skill. Choose professional installation if you want guaranteed results and have budget flexibility. Opt for DIY if you enjoy learning, have time to invest, and want full control over your audio system.
What are the most common car stereo tuning mistakes to avoid?
Avoid setting amplifier gain too high, which can damage equipment and create distortion. Don’t over-boost EQ frequencies, as this leads to unnatural sound reproduction. Never ignore your vehicle’s unique acoustics by using generic tuning approaches. Ensure proper speaker placement for clarity and always verify system performance across various music genres. Finally, select appropriately powered amplifiers to prevent distortion and maintain sound quality at all volume levels.