
Disney’s Cars franchise has captured hearts worldwide with its charming anthropomorphic vehicles racing through Radiator Springs. We’ve all watched Lightning McQueen zoom across the screen and felt inspired to bring these beloved characters to life on paper. Drawing Disney Cars isn’t just about creating simple sketches – it’s about capturing the personality and spirit that makes each character unforgettable.
Whether you’re a parent looking to bond with your kids through art or an aspiring artist wanting to master character design, learning to draw Cars characters opens up a industry of creative possibilities. We’ll guide you through the essential techniques that transform basic shapes into recognizable favorites like Mater, Sally, and Doc Hudson.
The best part? You don’t need professional art skills to get started. With the right approach and a little practice, we’ll help you create impressive Disney Cars drawings that’ll make both kids and adults smile with recognition.
Disney Cars Characters That Are Perfect for Drawing Practice
These iconic characters offer distinct visual elements that make them ideal subjects for developing your artistic skills.
Lightning McQueen’s Iconic Design Elements
Lightning McQueen’s sleek race car silhouette provides an excellent foundation for learning basic automotive proportions. His signature red paint job with lightning bolt graphics creates opportunities to practice color blending and detail work. The character’s expressive eyes sit prominently on his windshield, teaching artists how to convey emotion through facial features. We recommend starting with his streamlined body shape before adding the intricate sponsor decals and racing numbers. His confident smile and raised eyebrow expressions help beginners understand character personality translation in drawings.
Mater’s Rusty Charm and Character Details
Mater’s weathered tow truck design introduces artists to texture techniques and shading methods. His mismatched body parts and rust spots create natural practice opportunities for depicting wear and aging effects. The character’s buck teeth and wide grin offer simple yet distinctive facial features that are forgiving for novice artists. We suggest focusing on his uneven proportions and dented panels to master imperfection as an artistic element. His tow hook and cables provide additional details that enhance drawing complexity without overwhelming beginners.
Sally Carrera’s Sleek Porsche Features
Sally Carrera’s elegant Porsche 911 design teaches artists about smooth curves and sophisticated automotive styling. Her blue paint finish requires understanding of light reflection and surface polish techniques. The character’s graceful headlight eyes and subtle smile demonstrate how to create feminine automotive features. We find her streamlined body perfect for practicing flowing lines and aerodynamic shapes. Her pinstripe details and tasteful accessories introduce decorative elements that enhance overall composition skills.


Essential Drawing Supplies for Creating Disney Cars Artwork

Choosing the right art supplies transforms your Disney Cars artwork from basic sketches into professional-looking masterpieces. We’ve compiled the most effective tools that help capture every detail from Lightning McQueen’s sleek finish to Mater’s rusty charm.
Best Pencils and Erasers for Sketching
Graphite pencils ranging from 2H to 6B provide the perfect foundation for sketching Disney Cars characters with precision and depth. We recommend starting with an H pencil for initial outlines since it creates light marks that won’t damage your paper when erasing. Medium-grade pencils like HB and 2B work excellently for defining the main body shapes and basic proportions of characters like Sally Carrera or Doc Hudson.
Softer pencils from 4B to 6B excel at creating dramatic shadows and darker areas that give your Cars drawings dimensional depth. These grades help you achieve the contrast needed for Mater’s weathered surfaces or the glossy reflections on Lightning McQueen’s hood. Blending stumps enhance these effects by smoothing graphite transitions seamlessly.
Quality erasers make corrections effortless and preserve your artwork’s integrity throughout the drawing process. Kneaded erasers lift graphite without leaving residue while maintaining precise control over highlight creation. White vinyl erasers remove stubborn marks cleanly without tearing delicate paper fibers or smudging surrounding areas.
Colored Pencils and Markers for Vibrant Finishes
Premium colored pencils deliver the vibrant hues essential for authentic Disney Cars artwork that matches the animated film’s bold color palette. We suggest investing in professional-grade sets with at least 72 colors to capture every shade from Lightning McQueen’s signature red to Ramone’s purple paint jobs. Brands like Prismacolor Premier and Faber-Castell Polychromos offer superior pigment saturation and smooth application.
Alcohol-based markers create stunning smooth gradients and professional-looking finishes that replicate the glossy automotive paint seen throughout the Cars universe. Copic markers provide exceptional blendability for creating realistic metallic surfaces and chrome details on characters like The King or Chick Hicks. Their refillable design makes them cost-effective for frequent Disney Cars drawing sessions.
Gel pens and fine-tip markers add precise details and finishing touches that bring your Cars characters to life with authentic personality. White gel pens create brilliant highlights on headlights and windshields while black fine-liners define panel lines and racing numbers with professional precision.
Digital Drawing Tools and Software Options
Drawing tablets with pressure sensitivity revolutionize digital Disney Cars artwork creation by providing natural pencil-like control over line weight and opacity. We recommend Wacom Intuos or Huion H610 Pro tablets for beginners since they offer excellent responsiveness without overwhelming complexity. These devices connect seamlessly to computers and support multiple software applications.
Professional digital art software unlocks unlimited creative possibilities for Disney Cars illustrations with advanced features like layer management and custom brushes. Adobe Photoshop remains the industry standard for digital artwork creation while Procreate offers intuitive iPad-based drawing experiences perfect for portable Disney Cars sketching sessions.
Free software alternatives provide powerful tools without subscription costs for artists exploring digital Disney Cars creation. GIMP offers comprehensive editing capabilities similar to Photoshop while Krita specializes in digital painting with exceptional brush engines ideal for automotive artwork. Both programs support graphics tablets and include extensive tutorial resources for learning Disney Cars character design techniques.

Step-by-Step Guide to Drawing Lightning McQueen

Drawing Disney’s most famous race car becomes straightforward when we break it down into manageable stages. Let’s transform basic shapes into the iconic speedster that captured hearts worldwide.
Starting with Basic Shapes and Proportions
Begin with a horizontal oval for Lightning McQueen’s main body, making it approximately 3 inches wide and 1.5 inches tall. Position this oval slightly below center on your paper to leave room for the windshield above.
Sketch a smaller oval directly above the main body for the cockpit area, ensuring it’s about half the width of the base oval. This upper section should overlap the main body by roughly one-quarter of its height to create Lightning’s distinctive profile.
Add four small circles beneath the main body for wheel placement, spacing them evenly with the front wheels positioned closer together than the rear ones. Make the rear wheels slightly larger than the front ones to capture Lightning’s racing stance.
Connect these shapes with gentle curves to form the basic car silhouette, keeping the front end pointed and the rear end rounded. Use light pencil strokes during this foundation stage since we’ll refine these lines later.
Establish the windshield angle by drawing a curved line from the front of the cockpit oval down to the nose area, creating Lightning’s sleek aerodynamic look.
Adding Signature Details and Racing Numbers
Draw Lightning’s iconic lightning bolt on both sides of his body using sharp, zigzag lines that extend from just behind the cockpit to the rear wheel area. Make the bolt approximately one-third the height of the main body for proper proportions.
Add the number 95 prominently on Lightning’s doors and roof using bold, block letters that fill about 20% of the body space. Position the numbers so they’re clearly visible from a side view perspective.
Sketch the Rust-eze sponsorship logos as small rectangles on the hood and trunk areas, keeping them proportional to Lightning’s overall size. These sponsor decals add authenticity to your racing car drawing.
Include the Piston Cup series stripes along Lightning’s lower body using three parallel lines that follow his body’s curvature. These racing stripes should be evenly spaced and extend from the front bumper to the rear spoiler.
Define the headlight areas as two oval shapes on either side of the front nose, making them slightly angled upward to match Lightning’s confident expression.
Add the rear spoiler as a horizontal rectangle extending beyond the back of the car, positioned slightly above the main body line to show its aerodynamic purpose.
Perfecting the Eyes and Facial Expression
Create Lightning’s windshield eyes by drawing two large oval shapes within the cockpit area, making them approximately one-quarter the size of the cockpit itself. Position them side by side with a small gap between them.
Add the pupils as smaller black ovals within each eye, positioning them to look slightly forward and down to capture Lightning’s determined racing expression. Make sure both pupils point in the same direction for consistency.
Draw the upper eyelids as curved lines above each eye, creating a confident, focused look that’s signature to Lightning’s personality. These lines should follow the natural curve of the windshield.
Include subtle eyebrows above the windshield using thin, slightly angled lines that convey Lightning’s cocky yet charming attitude. Keep these minimal since race cars don’t have prominent facial features.
Add reflection lines within the windshield eyes using thin white or light colored streaks that suggest the glossy surface of Lightning’s windshield. Position these reflections in the upper portion of each eye.
Define the mouth area on the front grille using a horizontal curved line that suggests Lightning’s confident smile, keeping it subtle since his personality shows more through his eyes and overall stance.


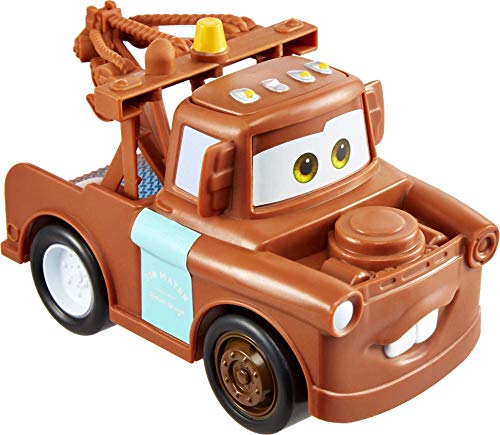
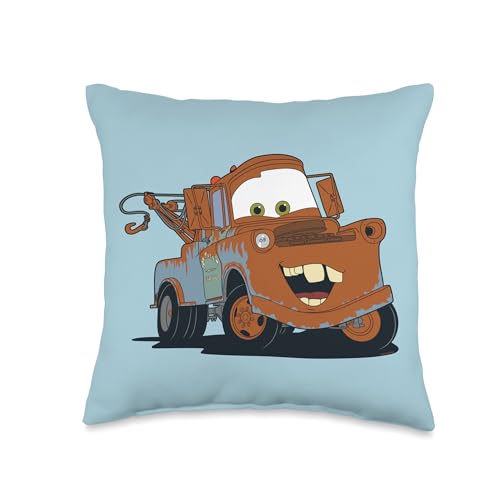
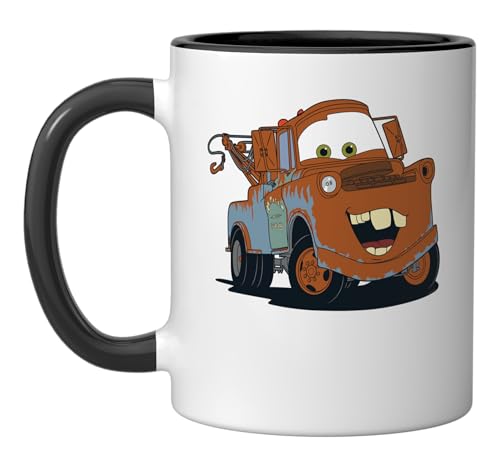
Mastering Mater’s Unique Tow Truck Design

Mater’s endearing personality shines through his wonderfully imperfect design, making him one of the most beloved characters to draw from Disney’s Cars universe. We’ll explore how to capture his rusty charm and distinctive features that make this tow truck so memorable.
Capturing His Weathered and Rusty Appearance
Start with Mater’s base color using a warm brown or tan pencil to establish his weathered foundation. We recommend layering different shades of brown, orange, and reddish hues to create authentic rust patterns across his body panels.
Apply rust spots irregularly across his surface, focusing on areas where real vehicles typically show wear like wheel wells, bumpers, and panel edges. Use short, choppy strokes with darker browns and oranges to simulate the organic nature of rust formation.
Create texture variations by alternating between smooth areas and roughened surfaces throughout his body. We suggest using cross-hatching techniques in heavily rusted sections while keeping other areas relatively clean to show his patchwork appearance.
Build depth by adding darker shadows in recessed areas and lighter highlights on raised surfaces. This contrast helps emphasize the dents, dings, and imperfections that give Mater his distinctive weathered character.
Drawing His Distinctive Front End and Tow Hook
Begin Mater’s front end with his characteristic rounded headlights that sit slightly crooked on his faded blue hood. We position these headlights at slightly different heights to capture his endearingly imperfect alignment.
Sketch his simple front grille using horizontal lines that appear slightly bent and weathered. The grille should look functional but aged, with some lines appearing more prominent than others to suggest years of hard work.
Add his iconic front bumper with its distinctive curve and visible wear patterns. We emphasize the bumper’s droopy appearance by drawing it lower on one side than the other, reinforcing his lovable, imperfect character.
Draw his tow hook mechanism extending from his rear end, starting with the main arm structure. The hook should appear sturdy yet worn, with careful attention to the cable or chain attachment point that defines his role as Radiator Springs’ tow truck.
Adding Character Through Facial Features
Position Mater’s eyes as his most expressive feature, placing them asymmetrically on his windshield to create his signature goofy charm. We draw one eye slightly higher than the other, using large, friendly pupils that convey his optimistic personality.
Create his buck-toothed smile by drawing his front bumper with a gap in the center, resembling a missing tooth. This detail transforms his bumper into his mouth, giving him that unmistakable Mater grin that fans adore.
Add laugh lines and expression marks around his eyes to show his jolly nature. These small details help convey the years of laughter and good times that define his character throughout the Cars franchise.
Include his signature dented areas and scratches that tell the story of his adventures. We strategically place these imperfections to enhance rather than detract from his appeal, showing that beauty comes in many forms.
Drawing Sally Carrera’s Elegant Porsche Form

Sally represents the perfect blend of automotive sophistication and Disney charm. Her sleek design challenges us to master smooth curves and elegant proportions.
Understanding Her Sleek Sports Car Silhouette
Drawing Sally’s Porsche silhouette starts with capturing her low, aerodynamic profile that distinguishes her from other Cars characters. We begin by sketching a long, curved oval for her main body, ensuring the front slopes down gracefully while the rear maintains that classic sports car stance.
Her roofline creates the most defining characteristic of her elegant form. We draw a gentle arc from the windshield to the rear spoiler, maintaining consistent curvature throughout. This single flowing line separates amateur sketches from professional looking drawings.
The wheel wells demand particular attention since they contribute significantly to her sporty appearance. We position them wider than Mater’s but lower than Lightning’s, creating that distinctive Porsche stance. Each wheel well should curve smoothly into the body panels without harsh angles.
Her side panels require subtle shading to emphasize her three dimensional form. We use light pencil strokes to suggest the gentle curves that run along her doors and rear quarter panels. These highlight lines bring depth and realism to our Sally drawing.
Creating Her Distinctive Headlights and Grille
Sally’s headlights serve as her most expressive facial features and require careful attention to detail. We start with two almond shaped ovals positioned at the front corners of her hood, angled slightly to create her friendly yet confident expression.
The inner details of her headlights include multiple reflective surfaces that bring her eyes to life. We draw small circles within each headlight to represent light reflections, positioning them consistently to maintain proper eye contact with viewers.
Her grille design follows Porsche styling cues while incorporating Disney’s character animation principles. We sketch horizontal lines across her front bumper area, keeping them subtle yet visible enough to suggest the classic sports car intake design.
The surrounding trim around her headlights adds authenticity to our drawing. We use thin, precise lines to outline each headlight housing, connecting them to the main body panels with smooth transitions that mirror real Porsche design elements.
Incorporating Her Tattoo and Personal Details
Sally’s pinstriping tattoo represents one of her most distinctive personal touches and requires steady hand control. We start by lightly sketching the tribal inspired design along her rear quarter panel, beginning with basic curved shapes before adding intricate details.
The tattoo’s flowing lines complement her natural body curves rather than fighting against them. We follow the contours of her rear fender, allowing the design to enhance her elegant silhouette while maintaining the rebellious spirit that defines her character.
Her license plate and other small details complete her personality driven appearance. We add her “301PCE” California plate using block letters, ensuring proper spacing and perspective to match her rear bumper angle.
The finishing touches include her subtle racing stripes and body panel separations that give depth to our drawing. We use light shading along these panel lines to create shadow effects that make Sally appear three dimensional rather than flat on our paper.


Advanced Techniques for Disney Cars Drawing Success

We’ll elevate your Disney Cars artwork by mastering professional techniques that transform basic drawings into stunning masterpieces.
Shading and Highlighting Methods
Strategic light source placement creates the foundation for realistic Cars drawings that pop off the page. We position our primary light source at a 45-degree angle above and to the left of our character, which naturally defines the shadows and highlights across the car’s metallic surfaces.
Form shadows appear on the side of the car opposite to our light source, while cast shadows fall beneath the vehicle and any protruding elements like spoilers or side mirrors. We apply darker values to recessed areas like wheel wells, grilles, and the space between body panels to create depth and dimension.
Reflected highlights capture the glossy finish of Cars characters by placing bright white spots on curved surfaces where light bounces directly toward the viewer. We use an eraser to lift graphite from areas like Lightning McQueen’s hood, roof, and side panels, creating those signature automotive reflections.
Gradient blending smooths the transition between light and shadow areas using blending stumps or tissue paper. We start with light pressure and gradually build up darker tones, ensuring our shadows follow the car’s three-dimensional form rather than appearing flat against the surface.
Creating Ever-changing Poses and Action Scenes
Racing positions showcase Cars characters in motion by tilting their bodies forward and lowering their front ends to suggest speed and momentum. We draw Lightning McQueen with his nose closer to the ground and his rear spoiler slightly elevated, creating that aerodynamic racing stance fans recognize instantly.
Motion blur effects around wheels and background elements convey rapid movement without overwhelming the main character. We use horizontal strokes behind our Cars figures and add subtle blur lines to spinning tires, suggesting rotation and forward momentum.
Banking turns add excitement by angling our characters as they navigate curves on the racetrack. We tilt Mater or Sally at 15-20 degrees when drawing them cornering, with their outer wheels slightly lifted and inner wheels compressed against the track surface.
Multiple action poses in a single composition tell ever-changing stories by showing different moments of movement. We sketch three or four versions of the same character in sequence, like Lightning McQueen accelerating from the starting line, creating a comic strip effect that captures the progression of speed.
Adding Background Elements and Racing Environments
Radiator Springs landscapes provide authentic settings by incorporating the desert mesas, vintage buildings, and Route 66 atmosphere from the films. We sketch the iconic rock formations using layered horizontal strokes and add the courthouse, Flo’s V8 Cafe, and other recognizable landmarks to establish scene context.
Racing track details enhance action scenes with realistic speedway elements like grandstands, pit crews, and track barriers. We draw the oval track using perspective lines that converge toward vanishing points, creating depth and showing the scale of professional racing environments.
Crowd atmosphere fills grandstands with simplified car shapes representing cheering spectators, using basic geometric forms rather than detailed individual vehicles. We vary the colors and add small flags or banners to suggest the energy and excitement of race day without overwhelming our main characters.
Environmental weather effects like dust clouds, rain, or sunset lighting add drama and mood to our Disney Cars drawings. We use soft strokes for dust clouds behind racing vehicles and warm orange tones for golden hour lighting that bathes the entire scene in cinematic atmosphere.


Common Mistakes to Avoid When Drawing Disney Cars

Even experienced artists can fall into common traps when drawing Disney Cars characters. We’ll explore the most frequent mistakes and provide answers to help you create accurate, professional-looking artwork.
Proportion Errors and How to Fix Them
Oversized wheels create the most noticeable proportion mistakes in Disney Cars drawings. We recommend measuring wheel diameter against the car’s body height using a 1:3 ratio for most characters like Lightning McQueen and Sally. Use your pencil as a measuring tool to maintain consistent proportions throughout your drawing.
Body length miscalculations often make cars appear stretched or compressed. Lightning McQueen’s body should measure approximately 2.5 times his height, while Mater’s proportions are more square due to his tow truck design. Create light guideline boxes before adding details to ensure proper scaling.
Windshield angles frequently appear too steep or too flat in beginner drawings. Study reference images to capture each character’s unique windshield slope – Lightning’s is more angled for aerodynamics, while Mater’s sits nearly vertical. Sketch the windshield frame first, then fill in the glass area.
Hood to bumper ratios require careful attention since Disney Cars characters have exaggerated proportions compared to real vehicles. We suggest dividing the car’s length into thirds: one-third for the front end, one-third for the cabin, and one-third for the rear section.
Color Matching Disney’s Official Character Designs
Lightning McQueen’s red isn’t a basic primary red – it’s a vibrant cherry red with orange undertones. Mix cadmium red with a touch of cadmium orange to achieve his signature color. Apply this base color evenly, then add darker red shadows in the wheel wells and panel lines.
Mater’s rust brown requires layering multiple earth tones to create authentic weathering effects. Start with a medium brown base, then add burnt umber for darker rust spots and raw sienna for lighter areas. Dab colors with a dry brush to create the textured, patchy appearance that defines his character.
Sally’s blue presents unique challenges since it shifts from light blue to deeper blue depending on lighting. Use cerulean blue as your base color, then blend with ultramarine blue for shadow areas. Her pinstripe tattoo requires a contrasting orange-red that complements her blue body color.
Avoiding muddy colors becomes crucial when blending multiple hues for realistic car finishes. Keep your color palette limited to 3-4 colors per character, and clean your brushes between applications. Layer colors gradually rather than mixing them directly on your drawing surface.
Maintaining Consistent Character Features
Eye placement variations can dramatically alter a character’s personality and recognition factor. Lightning McQueen’s windshield eyes sit in the upper third of his windshield, while Mater’s asymmetrical headlight eyes require careful positioning to maintain his lovable, goofy expression. Mark eye positions with light guidelines before adding details.
Mouth and expression inconsistencies often occur when drawing multiple angles of the same character. Sally’s smile curves gently upward at the corners, while Mater’s gap-toothed grin extends wider across his front bumper. Practice drawing facial expressions separately before incorporating them into full character sketches.
Logo and decal positioning must remain accurate to maintain character authenticity. Lightning’s “95” racing number appears on his doors and roof in exact locations, while his Rust-eze sponsor decals follow precise placement patterns. Create a reference sheet with logo positions before starting your final drawing.
Scale relationships between different characters require attention when drawing group scenes. Doc Hudson towers over Lightning McQueen, while Guido appears tiny next to both cars. Establish a ground line and use it to maintain proper size relationships across your entire composition.

Tips for Bringing Your Disney Cars Drawings to Life

Mastering the technical aspects of drawing Disney Cars characters is just the beginning of creating truly captivating artwork. We’ll explore advanced techniques that transform static sketches into ever-changing, personality-filled masterpieces that capture the heart and soul of these beloved automotive characters.
Adding Personality Through Expression
Emotional connection starts with the eyes, which serve as the primary focal point for conveying each character’s unique personality traits. Lightning McQueen’s confident sticker-eyes should appear slightly narrowed with a determined gleam, while Mater’s mismatched headlights create his signature goofy, loveable expression through asymmetrical positioning.
Mouth shapes dramatically alter the emotional impact of your Disney Cars drawings, transforming neutral expressions into memorable character moments. Sally’s sophisticated grille can appear welcoming with subtle curves, whereas Doc Hudson’s stern mouth conveys wisdom and authority through sharper, more angular lines.
Body language speaks volumes even in stationary poses, allowing artists to communicate character traits through subtle positioning adjustments. Tilt Lightning McQueen’s body slightly forward to show eagerness, or angle Mater’s frame in a relaxed, easygoing stance that reflects his laid-back personality.
Eyebrow positioning adds crucial emotional depth to facial expressions, creating nuanced feelings that resonate with viewers of all ages. Raise one side of Lightning’s brow for cockiness, lower both for concentration, or keep them neutral for his standard confident demeanor.
Creating Movement and Speed Effects
Motion lines establish ever-changing energy in your Disney Cars artwork, transforming static vehicles into high-speed racing machines that practically leap off the page. Draw curved lines flowing from the rear of the vehicle, varying their thickness and spacing to create realistic speed illusions.
Tire blur effects simulate rapid rotation, adding authenticity to racing scenes and action-packed moments throughout your Disney Cars drawings. Sketch overlapping circular shapes with gradually fading edges, using lighter pencil strokes to suggest the wheels spinning at incredible velocities.
Background streaking creates dramatic racing atmospheres that emphasize speed and excitement in your Disney Cars compositions. Apply horizontal lines behind moving characters, making them denser near the vehicle and gradually fading toward the edges of your drawing.
Dust clouds and debris enhance realism in off-road scenes featuring characters like Lightning McQueen racing through desert landscapes. Sketch irregular cloud shapes using light, feathery strokes that suggest dirt and sand being kicked up during high-speed maneuvers.
Banking and tilting angles convey cornering dynamics, showing characters handling turns with realistic physics that racing fans will appreciate. Angle the entire vehicle body slightly into the turn while keeping the wheels firmly planted on the ground surface.
Using Reference Images Effectively
Multiple viewing angles provide comprehensive character understanding, allowing artists to capture accurate proportions and details from every perspective. Study official Disney concept art, movie screenshots, and promotional materials to understand how each character appears from front, side, rear, and three-quarter views.
Lighting studies reveal surface textures and material properties that bring authenticity to your Disney Cars drawings through realistic rendering techniques. Observe how light reflects off Lightning McQueen’s glossy paint job compared to Mater’s weathered, matte surface finish.
Color palette analysis ensures accurate character representation, helping maintain consistency with official Disney designs that fans instantly recognize. Create color swatches from reference images to match Lightning’s vibrant red, Sally’s elegant blue, or Mater’s rusty brown tones.
Detail breakdown helps prioritize essential character elements while avoiding overwhelming complexity that can muddle your Disney Cars artwork. Focus on signature features like sponsor decals, unique body modifications, or distinctive accessories that define each character’s identity.
Sequential reference frames capture natural movement patterns, providing invaluable insights into how Disney animators create believable automotive motion. Study frame-by-frame sequences from racing scenes to understand suspension movement, tire deformation, and aerodynamic effects during high-speed sequences.


Conclusion
Drawing Disney Cars characters opens up a industry of creative possibilities that combines technical skill development with pure artistic joy. We’ve explored how each character offers unique learning opportunities – from Lightning McQueen’s sleek racing design to Mater’s weathered textures and Sally’s elegant curves.
The journey from basic sketches to detailed masterpieces doesn’t require professional training but does demand patience and practice. With the right supplies and techniques we’ve outlined you’ll find yourself creating artwork that captures the spirit and personality that makes these characters so beloved.
Whether you’re helping your children explore their artistic side or pursuing your own creative passion these timeless characters provide the perfect foundation for developing lasting drawing skills while having fun in the process.
Frequently Asked Questions
What drawing supplies do I need to draw Disney Cars characters?
For basic drawings, you’ll need graphite pencils of varying hardness (2H to 6B), quality erasers, and blending tools. For vibrant finishes, premium colored pencils and alcohol-based markers work best to replicate the bold Cars universe colors. Digital artists can use drawing tablets with software like Photoshop or free alternatives like Krita.
Which Disney Cars character is easiest for beginners to draw?
Mater is ideal for beginners because his weathered, imperfect appearance is forgiving to novice artists. His rusty texture and asymmetrical features make small mistakes less noticeable while teaching valuable techniques like layering colors and creating texture variations. His distinctive smile and headlights are also straightforward to capture.
How do I capture Lightning McQueen’s personality in my drawing?
Focus on his expressive eyes and confident facial features. Start with basic shapes for his sleek body, then add signature elements like his lightning bolt, racing number 95, and sponsor logos. Pay special attention to his eye positioning and mouth shape to convey his determined, confident personality that fans recognize.
What are common mistakes to avoid when drawing Cars characters?
The most frequent errors include proportion mistakes like oversized wheels or incorrect body lengths, inaccurate color matching, and inconsistent facial features. Avoid making windshields too steep or shallow, and ensure character-specific details like eye placement and mouth shapes remain consistent to preserve their unique personalities.
Do I need professional art skills to start drawing Disney Cars characters?
No professional art skills are required to begin drawing Cars characters. The article emphasizes that with the right approach and practice, anyone can create impressive drawings. Start with basic shapes and gradually add details. Each character offers unique learning opportunities for developing your artistic skills.
How can I make my Cars drawings look more professional and three-dimensional?
Use strategic shading and highlighting techniques with proper light source placement. Create depth through form shadows and reflected highlights to achieve a glossy finish. Add dynamic poses, motion blur effects, and detailed backgrounds like Radiator Springs landscapes to provide context and enhance the overall composition.
What’s the best way to draw Sally Carrera’s elegant design?
Focus on her smooth, aerodynamic Porsche silhouette with emphasis on curves and proportions. Pay special attention to her headlights and grille, which convey her personality. Don’t forget her distinctive pinstriping tattoo and other personal details. Use light reflection techniques to capture her sleek, polished appearance.
How do I create motion and speed effects in my Cars drawings?
Add motion lines around the character, create tire blur effects, and use background streaking techniques. Position characters in dynamic racing poses and incorporate environmental elements like dust clouds or speed lines. These effects help convey the excitement and energy characteristic of the Cars universe.