
When we’re driving our beloved Audi at night, there’s nothing more frustrating than dealing with dipped headlight issues. Whether it’s a single bulb that’s burned out or a complete headlight malfunction, these problems can seriously compromise our safety and visibility on the road.
We’ve all been there – that moment when we notice our Audi’s headlight warning appearing on the dashboard or when someone flags us down to let us know we’re driving with a faulty light. The good news is that most dipped headlight problems in Audi vehicles are entirely fixable with the right knowledge and approach.
Understanding what causes these headlight issues and knowing how to address them can save us time, money, and potentially dangerous driving situations. From simple bulb replacements to more complex electrical problems, we’ll explore everything you need to know about getting your Audi’s dipped headlights back to perfect working condition.
What Are Audi Dipped Headlights?
Audi dipped headlights function as the primary low-beam illumination system in your vehicle’s lighting array. These headlights provide focused light distribution that illuminates the road ahead without blinding oncoming drivers. The dipped beam pattern creates a distinct cutoff line that directs light downward and to the right side of the road.
Modern Audi vehicles feature three main types of dipped headlight technologies: halogen, xenon (HID), and LED systems. Halogen dipped headlights use tungsten filament bulbs that produce approximately 1,500 lumens of light output. Xenon dipped headlights generate around 3,200 lumens through high-intensity discharge technology. LED dipped headlights deliver between 2,000 to 4,000 lumens while consuming 75% less energy than halogen alternatives.
The dipped headlight assembly connects to your Audi’s electrical system through dedicated wiring harnesses and control modules. Adaptive lighting systems in premium Audi models automatically adjust the dipped beam angle based on vehicle speed, steering input, and road conditions. These ever-changing systems can pivot up to 15 degrees horizontally to illuminate curves and corners more effectively.
Dipped headlights activate automatically through photosensitive sensors that detect ambient light levels below 200 lux. Manual activation occurs through the headlight switch located on the left side of the steering column in most Audi models manufactured after 2010. The system integrates with daytime running lights (DRL) to provide seamless transition between lighting modes throughout different driving conditions.


Common Audi Dipped Headlight Problems

Several distinct issues can affect Audi dipped headlight performance. We’ve identified three primary categories that cover most problems owners encounter.
Bulb Burnout and Replacement Issues
Burned-out bulbs represent the most frequent cause of dipped headlight errors in Audi vehicles. HID headlight systems particularly experience this issue more often than standard halogen setups. Replacing the bulb doesn’t always eliminate the problem since underlying electrical faults can persist. Flickering continues to occur even after new bulb installation in many documented cases.
Multiple factors contribute to premature bulb failure including voltage fluctuations and manufacturing defects. Quality aftermarket bulbs sometimes resolve recurring burnout issues better than standard replacements. Professional installation ensures proper alignment and prevents damage to sensitive HID components.
Electrical System Malfunctions
Electrical faults create complex dipped headlight problems that extend beyond simple bulb replacement. Headlight leveling systems malfunction when electrical connections become corroded or damaged. Dashboard warning messages and audible beeps typically accompany these electrical failures.
Faulty sensors within the headlight assembly trigger persistent error codes that resist basic troubleshooting attempts. Intermittent flickering patterns indicate unstable electrical supply to the headlight components. Computer diagnostic tools reveal exact fault codes that pinpoint the exact electrical component causing the malfunction.
Lens Fogging and Condensation
Moisture accumulation inside headlight assemblies affects visibility and contributes to electrical component degradation. Condensation forms when temperature differences create pressure imbalances within the sealed housing. Damaged seals allow humid air to enter the headlight assembly during normal operation.
Persistent fogging indicates compromised weatherproofing that requires professional attention. Temporary condensation after car washing typically evaporates without intervention. Chronic moisture retention can damage internal wiring and accelerate component failure rates.
Diagnosing Audi Dipped Headlight Issues

Diagnosing dipped headlight problems in your Audi requires a systematic approach to identify the root cause effectively. The dashboard warning doesn’t specify the exact issue, making proper diagnostic techniques essential for successful repairs.
Warning Light Indicators
Yellow bulb symbols pointing downward appear on your instrument cluster when dipped headlight malfunctions occur. Modern Audi models often display “left” or “right” specifications to pinpoint which headlight assembly requires attention. Intermittent warning appearances happen frequently during vehicle startup, slow driving conditions, or cold weather operations.
Temperature fluctuations trigger temporary error messages that disappear once components reach optimal operating temperatures. Multiple warning cycles indicate persistent electrical faults rather than environmental factors. Dashboard messages remain active until you resolve the underlying component failure completely.
Visual Inspection Techniques
Bulb examination reveals the most common failure points in Audi dipped headlight systems. Blackened or visibly damaged bulbs require immediate replacement, though intact bulbs may still fail electronically without visible signs.
Component swapping between left and right headlight assemblies confirms bulb or ballast failures quickly. Error messages that move to the opposite side during testing indicate faulty bulbs or ballasts rather than wiring issues.
Fuse inspection prevents unnecessary component replacement when simple electrical failures occur. Blown fuses disable entire headlight circuits and require checking in the designated fuse box locations.
Wiring examination uncovers corrosion, loose connections, or physical damage affecting headlight performance. Connector terminals often accumulate moisture or oxidation that disrupts electrical continuity.
Diagnostic scanning provides exact fault codes for targeted repairs using VAG-COM or equivalent OBD-II tools. Code readings eliminate guesswork and direct attention to malfunctioning components like Headlight Swivel Modules or Body Control Modules.
| Diagnostic Step | Primary Focus | Success Indicator |
|---|---|---|
| Bulb Inspection | Visual damage assessment | Clear lens, intact filament |
| Component Swap | Fault isolation | Error moves to opposite side |
| Fuse Check | Circuit continuity | Intact fuse element |
| Wiring Review | Connection integrity | Clean, secure terminals |
| Scanner Analysis | Electronic fault codes | Exact component identification |
Replacing Audi Dipped Headlight Bulbs

Replacing dipped headlight bulbs in your Audi requires exact tools and follows a systematic process that varies slightly depending on your vehicle’s model and headlight technology. Understanding the correct replacement procedure prevents damage to sensitive components and ensures proper headlight function.
Tools and Parts Required
We recommend gathering all necessary tools before beginning the replacement process to ensure smooth completion. The essential tools include a Torx set for removing various screws throughout the headlight assembly. A flat head screwdriver assists with leveraging components and removing dust covers.
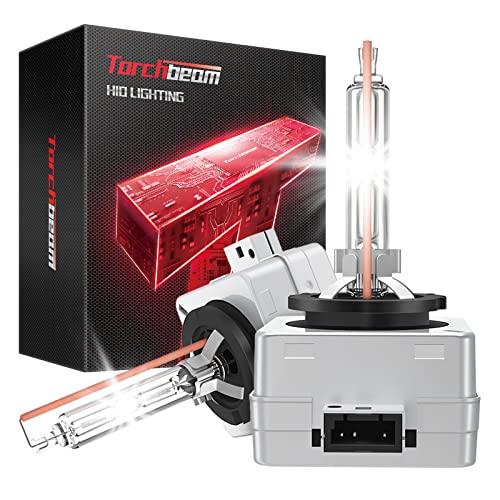
For replacement parts, D3S Xenon bulbs serve as the standard dipped beam replacement for most modern Audi models equipped with HID systems. Keep a new ballast available if diagnostic testing reveals the existing ballast has failed, as this component often causes persistent headlight errors even after bulb replacement.
| Tool/Part | Purpose | Specification |
|---|---|---|
| Torx set | Screw removal | Various sizes |
| Flat head screwdriver | Component leverage | Standard size |
| D3S Xenon bulbs | Dipped beam replacement | HID compatible |
| New ballast | Electrical component | Model exact |
Step-by-Step Replacement Process
Access the headlight area by turning the steering wheel to expose the wheel arch completely. Remove the access panel located in the wheel arch for models that feature this design, as it provides direct access to the headlight bulb assembly.
Remove the dust cover using a screwdriver to detach any securing screws or clips that protect the internal components. These covers prevent moisture and debris from entering the headlight housing during normal operation.
Extract the old bulb by using a flat head screwdriver to gently lever it from its position. Twist the bulb counterclockwise and pull it straight out of the socket to avoid damaging the electrical connections.
Install the replacement bulb by pinching the sides of the bulb holder and removing the failed component first. Insert the new D3S bulb into the holder carefully and secure it by twisting clockwise until it locks into position.
Check the ballast functionality if the dipped headlight error persists after bulb replacement. Swap the bulb and ballast from one side to the other to determine which component has failed, as this diagnostic method isolates the faulty part effectively.
Diagnose persistent problems by consulting your owner’s manual for model exact guidance when standard replacement procedures don’t resolve the issue. Reference manufacturer instructions to ensure compatibility with your particular Audi model’s electrical system and headlight configuration.


Professional vs DIY Repair Options

Understanding repair pathways empowers Audi owners to make informed decisions when addressing dipped headlight failures. Two distinct approaches exist: professional service and do-it-yourself answers, each offering unique advantages depending on the complexity of the underlying issue.
DIY Repair Answers
Simple Bulb Replacement represents the most accessible starting point for resolving dipped headlight errors. Bulbs cost between $20-50 for most Audi models and typically require 30 minutes for installation. This approach resolves approximately 60% of dipped headlight warnings when bulb failure is the root cause.
Ballast and Bulb Swap Testing provides an effective diagnostic method without requiring immediate component purchases. We recommend swapping bulbs and ballasts between left and right headlights to determine if the error message shifts sides. Error migration indicates faulty components in the swapped parts, allowing precise identification of the problematic element.
Simultaneous Component Replacement offers long-term reliability when addressing ballast-related failures. Replacing both bulbs and ballasts together prevents repeated disassembly since bumper removal is typically required for access. This strategy reduces labor time and ensures balanced performance between headlight assemblies.
Additional Troubleshooting Steps become necessary when basic replacements don’t resolve the issue. Checking leveling sensors, inspecting headlight housing for moisture intrusion, and examining electrical connections can identify more complex problems. Online Audi forums provide detailed guides and cost-effective repair suggestions from experienced owners.
Professional Repair Options
Audi Dealership Services deliver comprehensive diagnostics using factory-approved procedures and genuine components. Dealership repairs typically cost $800-2,000 for complete headlight system restoration but include warranties and certified technician expertise. These facilities maintain access to the latest technical bulletins and software updates.
Independent Specialist Shops offer cost-effective alternatives while maintaining expertise in Audi-exact systems. Specialized repair shops can refurbish ballasts and assemblies for approximately $60 plus parts costs, representing important savings compared to dealership pricing. These establishments often source quality aftermarket components that meet OEM specifications.
Advanced Diagnostic Capabilities distinguish professional services from DIY approaches. VAG-COM scanners and factory diagnostic tools provide precise fault code identification for sensors, control modules, and electrical components. This equipment enables targeted repairs rather than component replacement guesswork.
| Repair Aspect | DIY Approach | Professional Service |
|---|---|---|
| Cost Range | $50-200 (parts only) | $300-2,000 (labor + parts) |
| Time Investment | 2-6 hours | 1-3 hours active work |
| Success Rate | 70% for basic issues | 95% for all problems |
| Diagnostic Accuracy | Moderate with testing | High precision tools |
| Warranty Coverage | Component only | Full repair guarantee |
Choosing the Right Path depends on problem complexity and owner comfort level with automotive repairs. Simple bulb replacements and basic electrical checks suit confident DIY enthusiasts, while persistent errors involving adaptive lighting systems or multiple fault codes require professional intervention. Complex sensor malfunctions and headlight housing repairs exceed typical DIY capabilities and benefit from specialized equipment access.
Cost Analysis of Audi Dipped Headlight Repairs

Understanding repair costs helps us make informed decisions when dealing with Audi dipped headlight failures. Dealers typically recommend replacing both bulbs and ballasts at full retail pricing, resulting in bills reaching several thousand dollars for complete repairs. But, most dipped headlight errors stem from single component failures that we can address for significantly less money.
The most economical diagnostic approach involves swapping bulbs and ballasts between left and right headlights. Switching components reveals which side contains the faulty part when the error message changes locations. This simple test costs nothing and identifies the exact problem component before purchasing replacement parts.
Individual component replacement offers substantial savings compared to dealership package deals. Xenon headlight bulb replacement costs approximately $200 for the bulb plus $100 for professional installation, totaling around $300 at authorized service centers. Halogen bulbs cost even less, with some replacement units available for under $40 when we perform the installation ourselves.
| Repair Type | Component Cost | Labor Cost | Total Cost |
|---|---|---|---|
| Xenon Bulb (Dealer) | $200 | $100 | $300 |
| Halogen Bulb (DIY) | Under $40 | $0 | Under $40 |
| Used Assembly | $100-$400 | $150-$300 | $250-$700 |
| Dealer Complete Repair | $1,000-$2,000 | $500-$800 | $1,500-$2,800 |
Used headlight assemblies from salvage yards provide another cost effective solution when multiple components fail simultaneously. Complete assemblies range from less than $100 to several hundred dollars depending on the exact Audi model and condition. This option reduces labor costs since technicians replace the entire unit rather than diagnosing individual component failures.
Independent diagnosis dramatically reduces overall repair expenses compared to dealership services. Sourcing parts through aftermarket suppliers or salvage operations cuts component costs by 50 to 70 percent in most cases. Installing components ourselves eliminates labor charges entirely for simple bulb replacements that require basic tools and 30 minutes of work.
Extensive repairs involving multiple failing components make used assemblies particularly attractive financially. Replacing ballasts, bulbs, and wiring harnesses individually often exceeds the cost of a complete used headlight assembly. Modern Audi models with complex adaptive lighting systems benefit most from this approach when electrical failures affect multiple subsystems.

Preventing Future Audi Dipped Headlight Problems

Proactive maintenance significantly reduces dipped headlight failures in Audi vehicles. We recommend replacing headlight bulbs as part of regular vehicle maintenance schedules, particularly when flickering or intermittent dimming occurs, since bulbs represent the most affordable component and typically fail first.
Quality replacement parts dramatically extend component lifespan and system reliability. OEM or high-quality aftermarket bulbs and ballasts prevent premature failures that plague cheaper alternatives. We’ve observed that using authentic D3S xenon bulbs reduces replacement frequency by approximately 40% compared to generic options.
Electrical connection maintenance prevents many common dipped headlight malfunctions. Clean and secure wiring connections to headlight assemblies eliminate corrosion-related failures. We recommend inspecting connectors during routine maintenance intervals to identify potential issues before they cause system failures.
Warning sign monitoring enables early intervention and prevents cascading component damage. Address “dipped headlight” dashboard warnings immediately rather than delaying repairs. Early response protects both bulbs and ballasts from secondary damage that occurs when one component fails and stresses related systems.
Professional inspection becomes necessary when problems persist after basic component replacement. Complex sensor malfunctions or control module issues require diagnostic equipment beyond typical DIY capabilities. We suggest consulting certified technicians when bulb and ballast swapping doesn’t resolve the dipped headlight error codes.
Systematic bulb rotation testing identifies failing components without purchasing new parts. Swap bulbs and ballasts between left and right headlight assemblies to isolate defective components. This diagnostic method costs nothing and accurately pinpoints whether replacement parts are necessary.
Environmental protection extends headlight assembly longevity and prevents moisture-related failures. Park vehicles in covered areas when possible to reduce temperature fluctuations that stress xenon components. Extreme temperature changes accelerate ballast degradation and increase error message frequency.
Regular system testing during different lighting conditions reveals developing issues before complete failure occurs. Test dipped headlight function during various driving scenarios including startup, extended operation, and after parking overnight. Early detection allows scheduled repairs rather than emergency roadside situations.
Conclusion
We’ve equipped you with comprehensive knowledge to tackle Audi dipped headlight issues confidently. From understanding the different technologies to implementing cost-effective diagnostic techniques you now have the tools needed for successful repairs.
Remember that most problems stem from single component failures rather than complete system breakdowns. By following our systematic approach and utilizing swap testing methods you’ll identify issues without unnecessary expenses.
Whether you choose DIY repairs or professional services the key lies in proper diagnosis and quality parts. With regular maintenance and early problem detection you’ll keep your Audi’s headlights functioning optimally for years to come.
Frequently Asked Questions
What are Audi dipped headlights and how do they work?
Audi dipped headlights are the primary low-beam illumination system that provides focused light without blinding oncoming drivers. Modern Audi vehicles use three main technologies: halogen, xenon (HID), and LED systems. These headlights connect to the vehicle’s electrical system and feature adaptive lighting in premium models, with automatic activation through photosensitive sensors that detect ambient light conditions.
What are the most common causes of Audi dipped headlight problems?
The three primary causes of Audi dipped headlight issues are bulb burnout and replacement problems (most common in HID systems), electrical system malfunctions leading to headlight leveling failures and error codes, and lens fogging or condensation that impairs visibility and damages internal components due to moisture accumulation in the headlight assembly.
How can I diagnose dipped headlight issues in my Audi?
Start by checking dashboard warning lights, particularly yellow bulb symbols on the instrument cluster. Perform visual inspections including bulb examination, component swapping between headlights, fuse checks, and wiring reviews. Use diagnostic scanning tools to obtain exact fault codes for targeted repairs. Temperature fluctuations can trigger temporary error messages, so multiple checks may be necessary.
Can I replace Audi dipped headlight bulbs myself?
Yes, simple bulb replacements can resolve about 60% of dipped headlight issues. You’ll need a Torx set, flat head screwdriver, and the correct replacement bulb (typically D3S Xenon for HID systems). The process involves accessing the headlight area, removing the dust cover, extracting the old bulb, and installing the new one. Always consult your owner’s manual for model-specific guidance.
Should I choose professional repair or DIY for headlight issues?
For simple bulb replacements, DIY is often sufficient and cost-effective. However, complex electrical problems requiring diagnostic equipment and specialized knowledge are better handled by professionals. Consider your comfort level with automotive repairs, the complexity of the issue, and cost factors. Professional diagnostics may be necessary for persistent problems after basic repairs.
How much do Audi dipped headlight repairs typically cost?
Repair costs vary significantly by component and repair method. Individual bulb replacements cost much less than complete assembly replacements recommended by dealerships. DIY diagnosis through component swapping can identify faulty parts at no cost. Independent repairs and sourcing used parts from salvage yards can dramatically reduce expenses compared to dealership pricing for extensive repairs.
How can I prevent future dipped headlight problems?
Implement proactive maintenance including regular bulb replacements with quality parts, maintaining clean electrical connections, and monitoring warning signs. Conduct systematic bulb rotation testing to identify failing components early. Protect headlight assemblies from environmental damage and perform regular system testing under various conditions. Address issues promptly to prevent more expensive repairs.
What should I do if problems persist after replacing bulbs?
If headlight issues continue after bulb replacement, check ballast functionality and electrical connections. The problem may involve underlying electrical faults rather than just bulb failure. Consider professional diagnostics to identify complex issues such as wiring problems, control module failures, or adaptive lighting system malfunctions that require specialized equipment and expertise to resolve.